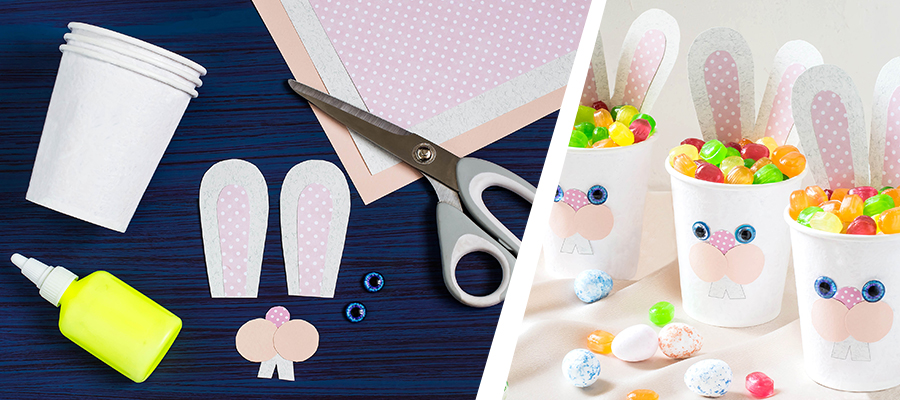
How to Make a Cute Easter Bunny Cup Decoration
Materials (for 1 bunny)
Foam cup (or plastic cup)
White cardboard
Pink foam sheet
Scissors
Black marker
Glue
Pen or pencil
2 blue eyes ( optional)

Instructions
1. Fold the white piece of paper in half.
2. Use a pen or pencil to draw the outline of a bunny ear. Make the ear as large or small as you want.
3. Using a pair of scissors, cut around the outline of the ear. Because you have folded the paper in half, you will end up with two identical bunny ears.
4. You have now created the outer ears for the bunny, but you still need the pink inner ears. For this, you will use the pink foam sheet.
5. As with the outer ears, you can cut two identical inner ears out simply by folding the foam sheet in half before you cut.
6. Attach the inner ears to the outer ears with glue in order to complete them.
7. You'll use the same pink foam sheet to cut out the shape of the bunny’s nose. Glue this onto your cup. Note that the cup should be upside-down. This makes the bunny more stable on the surface where you choose to display it.
8. Once you have the nose in place, glue on the bunny's ears. It'll look best if you glue them onto the back of the cup.
9. You now simply need to draw on the rest of the bunny’s features using a black marker. Draw the eyes above the nose, the whiskers extending from the nose and the teeth right below the nose. If you bought blue eyes ( as in the pictures), glue then instead of drawing them. Your Easter bunny is ready!


